The business of retail has grown tremendously as a result of online shopping platforms. Along with the growth of retail, the distribution sector has been affected positively as well. Online shopping platforms allow sellers more exposure than traditional shopping. They give more visibility to the sellers and their products. Sellers can now sell their products to potential customers residing in any part of the country. The hindrance of transportation has been eliminated as a result. Furthermore, a business can market its products to consumers without boundaries and grow exponentially by utilizing the power of online shopping. In this article we define the process of Amazon Seller Registration.
Realizing the potential of online sales, we arrived at the conclusion that it was best to educate our readers on how to get started on Amazon. Amazon is the world’s largest online shopping platform. It is in wide usage in India as well. Owing to the large population and also the extremely high number of mobile phone users in the country, harnessing the power of Amazon and other online shopping platforms can really make a difference for a business. It can add to a business’s revenue manifold.
Process of Amazon Seller Registration
1. Login with your existing Amazon account or registered and create a new one.
We prefer that you create a new Amazon account different from your personal one and kept reserved only for your business.
Note that to register your business on online you need to mention your bank details along with your GST invoice or Pan details
2. Enter Business Name.
After Creating your account or logging in with the existing one type in the business name or the name of the company. Note that this must be same as the legal name of your business as mentioned on your GST certificate.
Read the Business Agreement, Addendum to the Business Agreement and the EasyShip Terms and Conditions before you proceed to the next step.
After agreeing to the terms and conditions, click on proceed.
3. Choose and Enter Store Name
On the new page choose your store name. It is the name that is displayed under the product that was selling. Note that it does not have to be the same as your business or company name and it has to be unique. It implies that it must not be exactly similar to any existing seller’s store name.
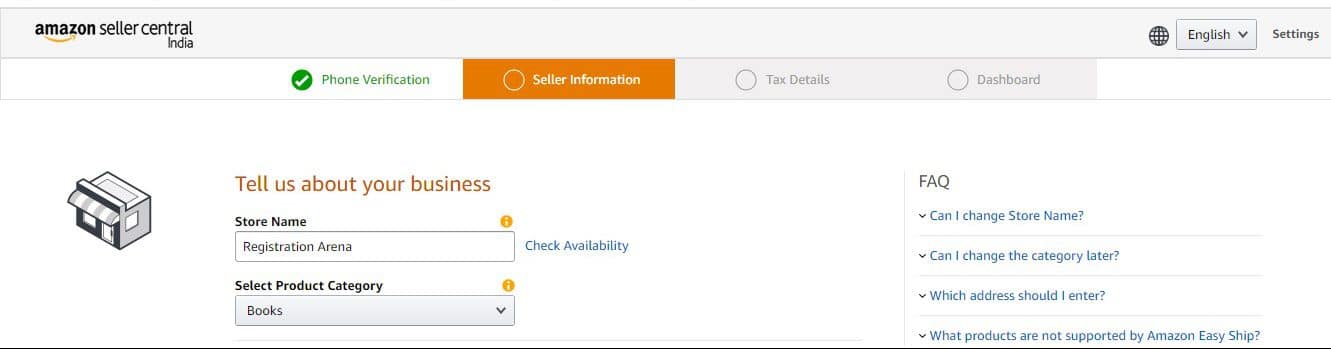
4. Select the category of products that you’re selling
Then choose the address that you are selling out of. Note that amazon automatically takes into consideration the address that you inputted at the time of your Amazon account registration. If you are willing to enter a different address then click on add a new address. This address must be the place of your business since Amazon would pick up the goods from this address.
5. Whatsapp Opt-In
After this Amazon gives you the option to opt in for messages from Amazon on your WhatsApp. Note that the WhatsApp number here is the one you registered or you account with. Change the number in your account if you want a different number to receive business updates on. Make sure that this number is registered on Whatsapp.
6. Opt for Amazon EasyShip Service
Below the Whatsapp opt-in, Amazon gives you the option to also opt in for its EasyShip service. Be sure to read the EasyShip Terms and Conditions before opting in for the service. EasyShip service fulfills the packaging and shipping of the product. It also handles the payment on behalf of the seller. This saves the seller from engaging in the hassle of shipping products. This service is a necessity for the majority of the sellers. However, Amazon charges a nice fee for this service which is discussed below under Pricing & Fees.
7. Enable Two-Step Verification
Following this you will need to enable 2 step verification on your account. To do this login again into your account when prompted. Then choose how you would like to generate the OTP. After you receive the OTP, enter it and proceed.
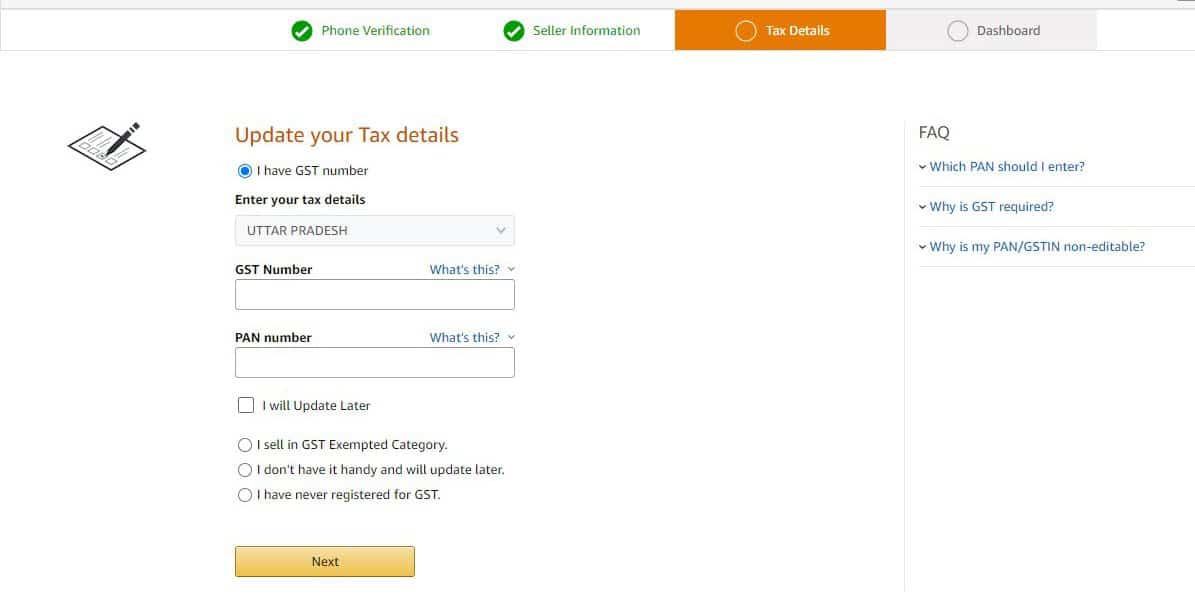
8. Enter Tax Details
Once two step verification is enabled, you will arrive at the Tax details tab. Under this tab you are required to enter your Tax details. Note that the state that is mentioned in your account will be the one displayed here. Choose the option as per your requirement.
- Input your GST details and your PAN details below.
- In case you do not have your details regarding taxation you can choose the option ‘I will update later’
- You also have the option to opt for selling under the GST exempted category. Under this you will need to mention only your PAN details.
- If you do not have GST you can choose ‘I have never registered for GST’. After you choose this option Amazon will prompt you to apply for GST since it is a compulsion for selling on Amazon and the people who do not need GST are the only ones who are exempted from it.
9. Dashboard
At the end you arrive at the dashboard. This gives an overview of your entire account. The categories of goods that you have chosen you will be able to list here. You also have the option to add or remove product categories. If you are dealing in products which do not have a product ID you can inform Amazon by using the option below add or remove categories. You can modify your shipping services on the dashboard. Remember to update your bank details on the dashboard under the tab bank account details. If you chose not to update your GST and PAN early on you can update it from your dashboard. You also have the option to add or upload your signature.
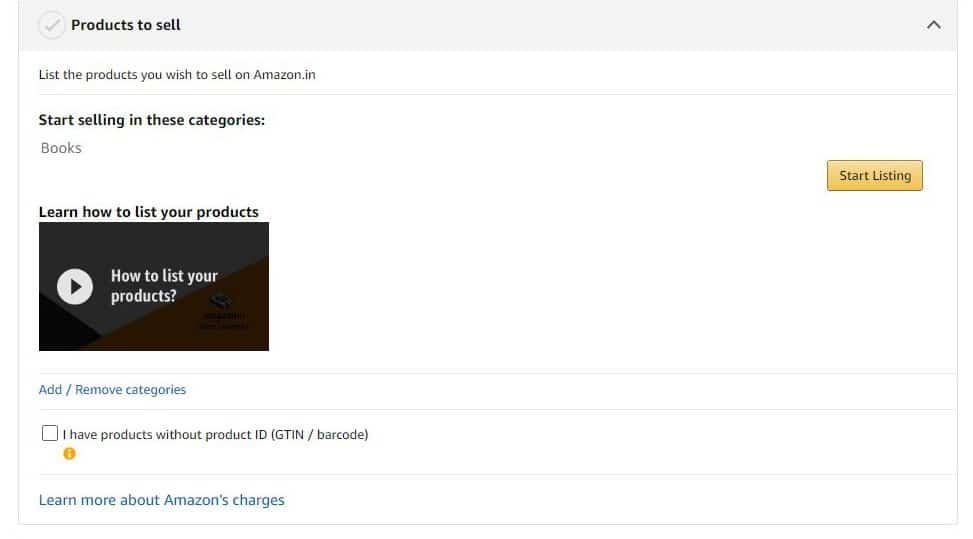
Dashboard – Products to Sell
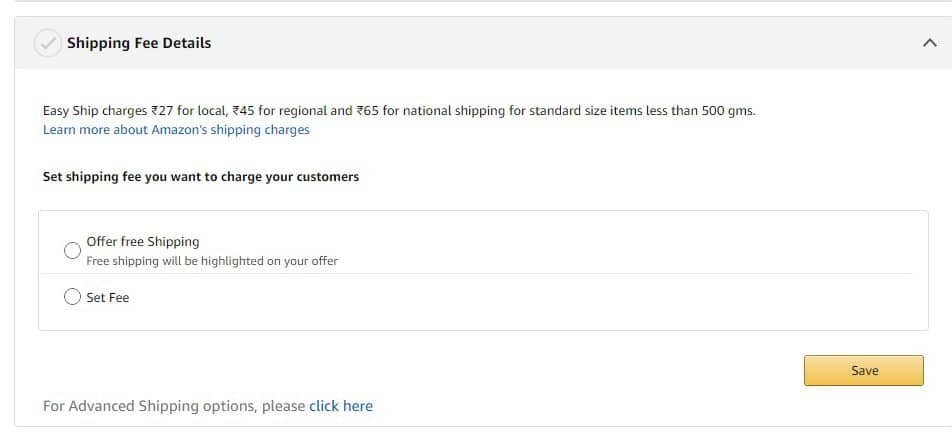
Shipping Fee Details
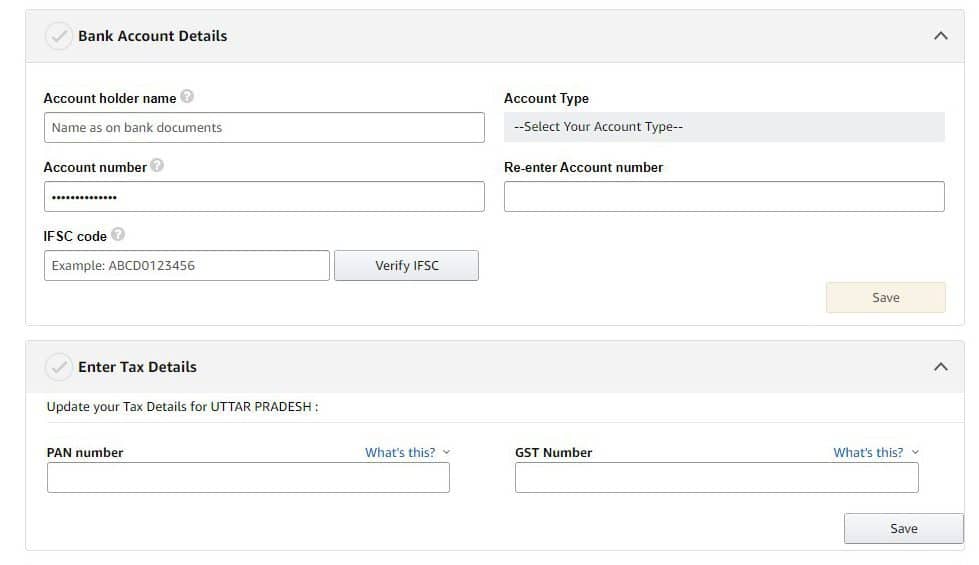
Bank and Tax details
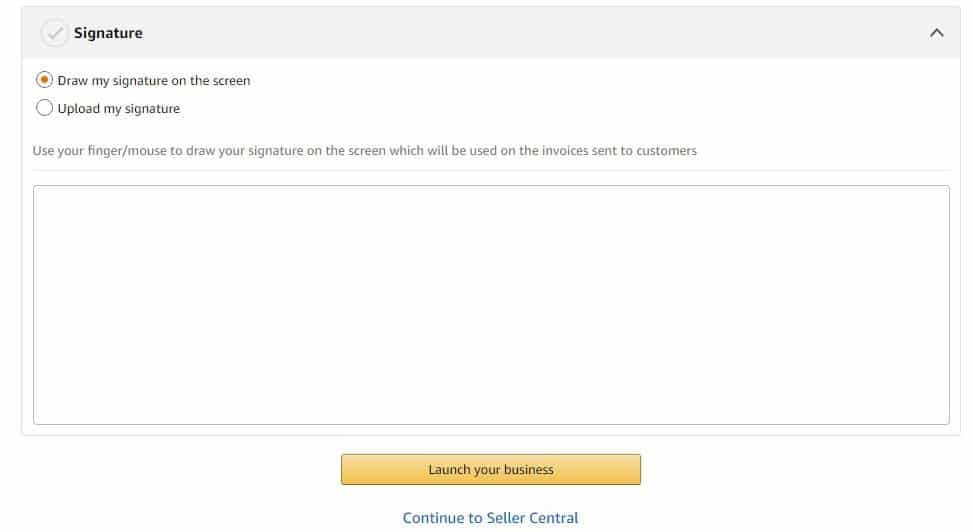
Dashboard – Signature
10. Start Selling
Your business will commence as soon as you click on launch your business.
Requirements
Amazon requires you to input your:
- Phone Number
- Name
- Business address
- Category of products
- It also requires documents pertaining to the registration of your business and tax information.
Fees
Amazon follows a revenue model which requires its seller to pay Amazon only when they make a successful sale. It has a complex pricing model which we break down under various heads in this section of the article.
1. Referral fee
Amazon charges a certain percentage of the price of the product as a referral fee. This percentage of referrals fee varies from category to category of products. It is a lowest of 2%. This fee is charged to compensate Amazon for the exposure it gives your brand, business and product
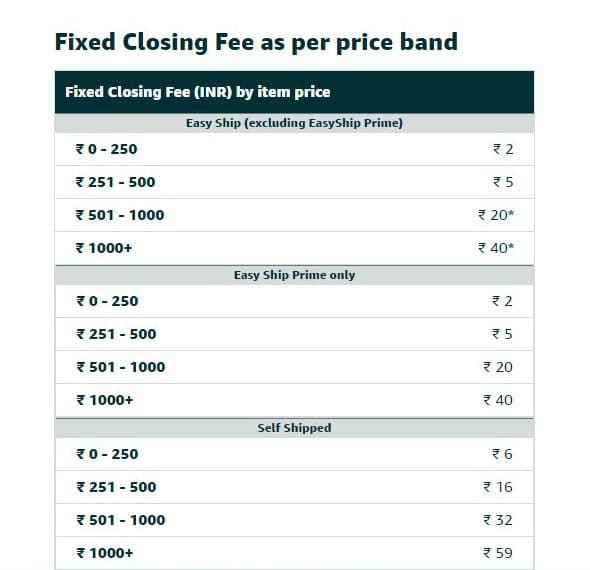
2. Closing fee
It also charges a closing fee which depends on the price of the product. It varies as-
3. Shipping fees
This is the most significant and of the highest magnitude. Shipping fees are charged by Amazon and are dependent on the product. If you choose to ship using Amazon EasyShip, only then will you be prompted to pay the fees. You can also ship your products by your own self but that is a hassle for the majority of the sellers. Under Amazon easy ship, the fee differs on grounds of distance and weight.
4. Location
When a product is shipped-
- Locally a charge of 38 rupees is levied
- Regionally a charge of 46 rupees is levied
- Nationally charge of 66 rupees is levied
Note that this is keeping in mind when the weight of the product is 500 grams.
5. Weight
Up to 500 grams Amazon does not feature any surcharge
If the product exceeds 500 grams but falls under 1 kilo, Amazon charges-
- 16 rupees if it is to be shipped locally
- 21 rupees if it is to be shipped regionally
- 25 rupees if it is to be shipped nationally
To know about weight surcharge refer to the Amazon Pricing Calculator.
At the end, 18% of GST is charged on the total fees.
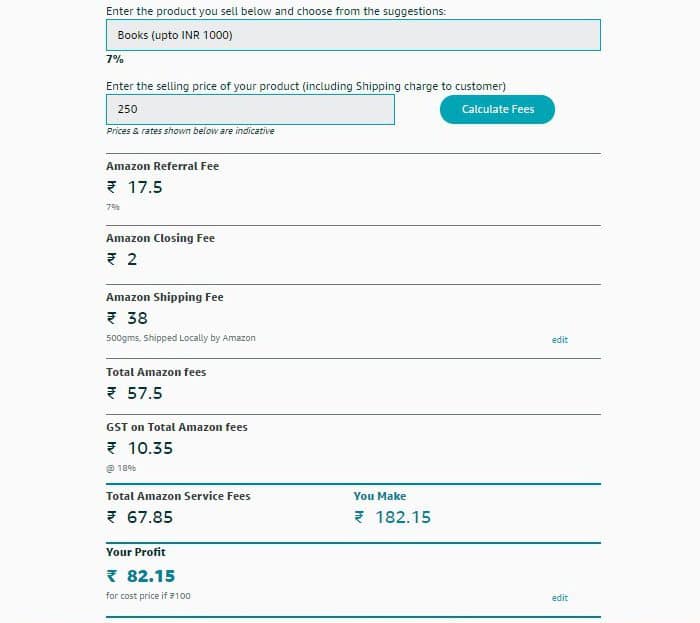
For more insights into the pricing structure and to calculate a close estimate of the fees and the net amount that you will earn from your transactions, use Amazon Pricing Calculator.
Amazon Pricing Calculator
It aids business owners who want to move their businesses online by estimating the costs they would incur if they choose to sell their product online and the revenue they will generate from the transaction.
Amazon Seller’s App
The company features a separate application specific for the business owners. This application is Amazon Seller’s App. Interested Business Owners can initiate their Amazon Seller Registration through it. This enables the business owners to always be in touch with their online business through the use of their mobile phones. Download the app from the Google Playstore or the App store.
Conclusion
Before registration, Amazon requires businesses to have GST Details and PAN. Also the popular form of business entities on Amazon are Private Limited Companies and LLPs. (To name a few). At Registration Arena, We help businesses obtain GST, PAN, TAN and with IT filing. We also incorporate Private Limited Companies, One Person Companies and Limited Liability Partnerships. Reach out to us for any assistance regarding your business.